How to clean stainless steel appliances? You probably have heard of 1001 methods and products to clean them. A bit exaggerated, maybe, but that’s the general feel of it.
Many homeowners will tell you that vinegar is the best cleaner, while others will choose a more commercial approach like Windex.
The truth is:
There is no single correct method to clean stainless steel, but a series of factors to consider before cleaning. Bear with me, and let’s learn something about stainless steel.
The nature of stainless steel appliances
Stainless steel is commonly found in kitchens. And with good reason! Probably you chose your fridge based on the many benefits stainless steel offers, like resistance to damage, heat, and rust. Also, stainless steel gives a sleek and sophisticated look to every home.
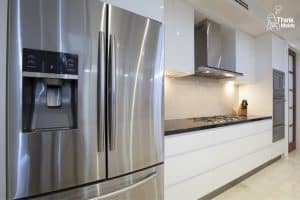
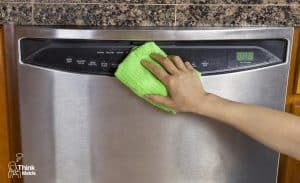
Although resistant, stainless steel surfaces can show frequent and annoying fingerprints and spill stains, which ruins the pretty view of your kitchen. However, cleaning them is easy once you get the hang of it.
If you’re doubtful, don’t worry! That’s a good thing. Every stainless surface is different from each other, and perhaps during your first tries, you will find yourself doubting.
How to clean stainless steel appliances? Best tips here:
1. Don’t overthink it! Create a habit.
Keeping your stainless steel appliances in top shape has a lot to do with how often you clean them. For example, if you don’t clean oily fingerprints for too long, they will end up all covered with dust and dirt.
Don’t overthink it: with a microfiber cloth and water, you can do wonders.
Keep a cloth nearby and do a quick wiping every day. With this method, you can erase the easy stains. Remember to clean off the remaining residue with a dry cloth.
2. Always check the manual
Although appliances can look the same, there are several types of stainless steel, with different finishes and containing different quantities of metal. These factors make every model different and they might require a slightly different cleaning method.
Check the manufacturer’s recommendations before you start your deep cleaning routine.
3. Remember to spot-test
Even if you’re using one of the popular brands available, many homeowners recommend testing the cleaner in a small and discreet area on your appliance. This easy technique will allow you to see the effects on the surface without risk. If you like what you see, proceed!
Consider this tip if you’re using vinegar, baking soda, or alcohol. Even natural products can leave an undesired residue on your surfaces!
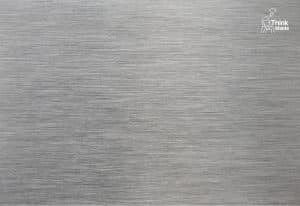
4. Follow the grain while wiping
Like wood furniture, stainless steel has a grain. If you want to be as effective as possible when wiping (and avoid damage), you must go with the grain. The grain consists of the thin lines on the surface.
To find the right direction to clean, gently wipe vertically and horizontally. If you feel some kind of resistance, that means you are against the grain. Also, avoid wiping in a circular motion.
Related: if you want a professional to clean your appliances for you, check here how hiring a home cleaning service works.
Best DIY cleaners to use:
- Dish soap (a few drops in warm water)
- Baking soda (mixed with warm water)
- Vinegar (half vinegar, half water)
- Microfiber cloth
Does vinegar damage stainless steel? Not really. However, every cleaning product will affect the finish if not properly removed from the surface. Vinegar, baking soda, and dish soap are great and safe cleaners, but always rinse and wipe with a cloth after using them.
Remember to always:
Opt for a microfiber cloth because they absorb water better than other fabrics and without leaving scratches. Avoid paper towels and fabrics that can leave residues.
Experts recommend using only water and a cloth for daily maintenance, like when dissolving water spots. To get rid of oily fingerprints or greasy stains, you can use a combination of dish soap with warm water.
Wipe gently on a single spot and watch the result. If the stain is gone, continue with the rest of the surface, scrubbing firmly if necessary but always following the grain lines (see tip number four).
Use these cleaners with caution:
- Club soda
- Baby oil
- Mineral oil
- Windex
- Rubbing alcohol
Some homeowners recommend rubbing alcohol or glass cleaners like Windex to eliminate the more stubborn stains. However, these methods will be risky depending on the conditions of your home, and the type of stainless steel you have.
Proceed with caution! Spot-test (see tip number three) before using any new cleaning product, either industrial or natural. Windex and other cleaning products can leave ugly stains on the surface if you don’t rinse properly afterward.
Many renowned homeowners recommend oils, especially those who praise green or natural products like vinegar or baking soda. Essential oils won’t damage your stainless steel. However, if your home is dirty, you’ll probably end up with a fridge covered in dust.
When used with caution—and vacuuming beforehand—oils can be a great ally that will recover the lost shine of your appliances.
Totally avoid:
- Chlorine bleach
- Steel wool
- Abrasive sponges
What to not use on stainless steel? Any harsh chemical like bleach. No stain or streak is stubborn enough to deserve bleach. Avoid permanent damage to your appliances and use some of the safer cleaners mentioned in the previous points.
With care, dedication, and elbow grease, you can dissolve anything from your stainless steel.
Avoid any rasping materials like steel wool or hard brushes. Abrasive sponges should be out of the game too. Your appliances deserve gentle scrubbing and the right product. Also, (see tip number four) avoid a circular motion while wiping or scrubbing. Always follow the grain!
Want a professional to clean your appliances?
We hope you learned something about how to clean stainless steel appliances. We are happy to help! Think Maids is a professional cleaning company located here in Washington, and we have several years of experience cleaning homes. Do you want to know about our services? Visit our homepage.

![How To Clean Hardwood Floors Safely + Best Tips For Wood! [Infographic]](https://www.thinkmaids.com/wp-content/uploads/2021/09/Think-Maids-How-To-Clean-Hardwood-Floors-Safely-Best-Tips-For-Wood-Infographic.jpg)
![Think Maids - 5 Benefits From Using Green Cleaning Products]](https://www.thinkmaids.com/wp-content/uploads/2021/07/Think-Maids-5-Benefits-From-Using-Green-Cleaning-Products-477x1024.jpg)